A filter list always contains a Default filter tree after you install the app successfully. The filter tree will display in all collections page by default. When you create a new filter and apply it to a specific collection, this filter will replace the default filter in that collection.
In this example, Lets create new filter that will overwrite the default filter.
Step 1 : Initialization
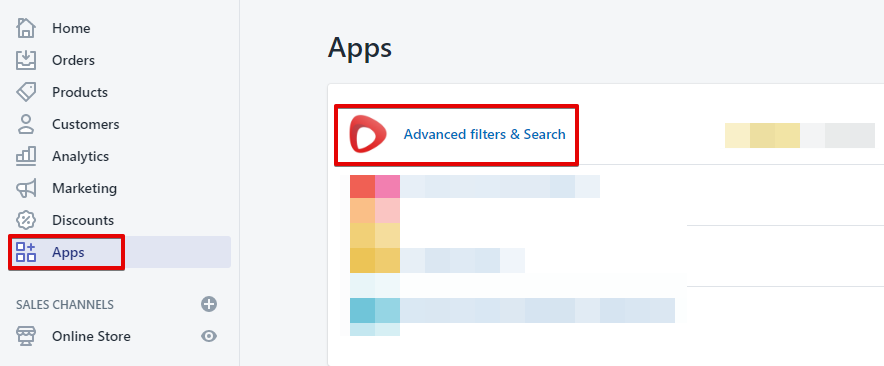
1. From your Shopify admin, go to Apps and select Advanced filters and search application.
Step 2 : Add Filter Tree
1. From application menu, click Filters, from filters page, click Add filter tree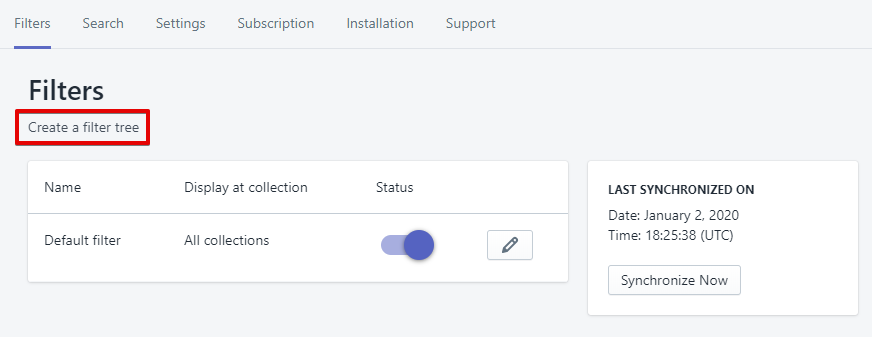
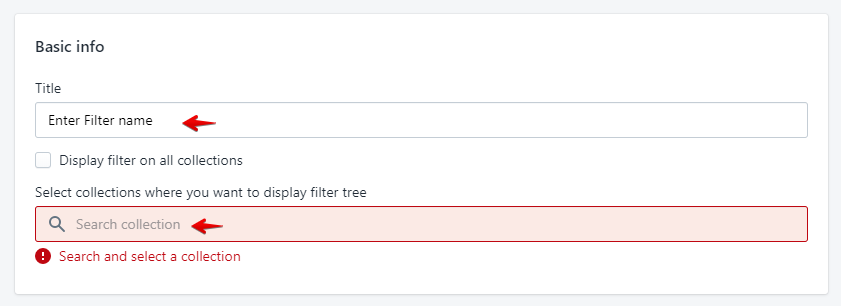
2. Add basic information for the filter tree.
Title used to distinguish among multiple filter trees. Website visitors will not see this title.
Select collection: Select one or more collections on which you want to apply the filter tree.
Step 3 : Add Filter Options
1. Add filter options to the filter tree according to our business requirements. Click "Add a filter option", a dialog will display as follows:

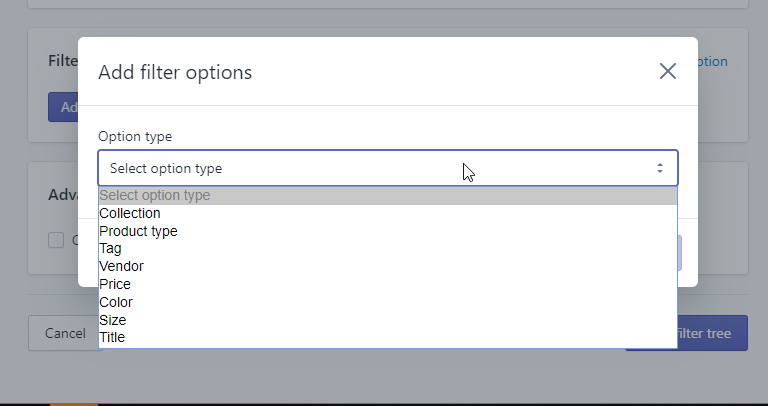
There are 5 standard filter option types:
1. Filter options based on collections
2. Filter options based on Product types
3. Filter options based on Tags
4. Filter options based on Vendors
5. Filter options based Price
There are some more filter option types based on the products in your store like title, size, and color etc.
Depending on the Option type you have just chosen, it will show additional options:
Option label: Name of the filter option visible to the customers.
Option display: Types of filter option, which are: List, Box, Swatch and Range slider
Option select: allow a filter option to be chosen one time only or multiple-choice. There are two options: Single and Multiple.
Option values: allow a filter option to display all values or specific values to the customers.
Click "Add" and new filter option will be added to Filter options table.
Step 4 : Complete
Click "Save filter" to create the filter.

Result
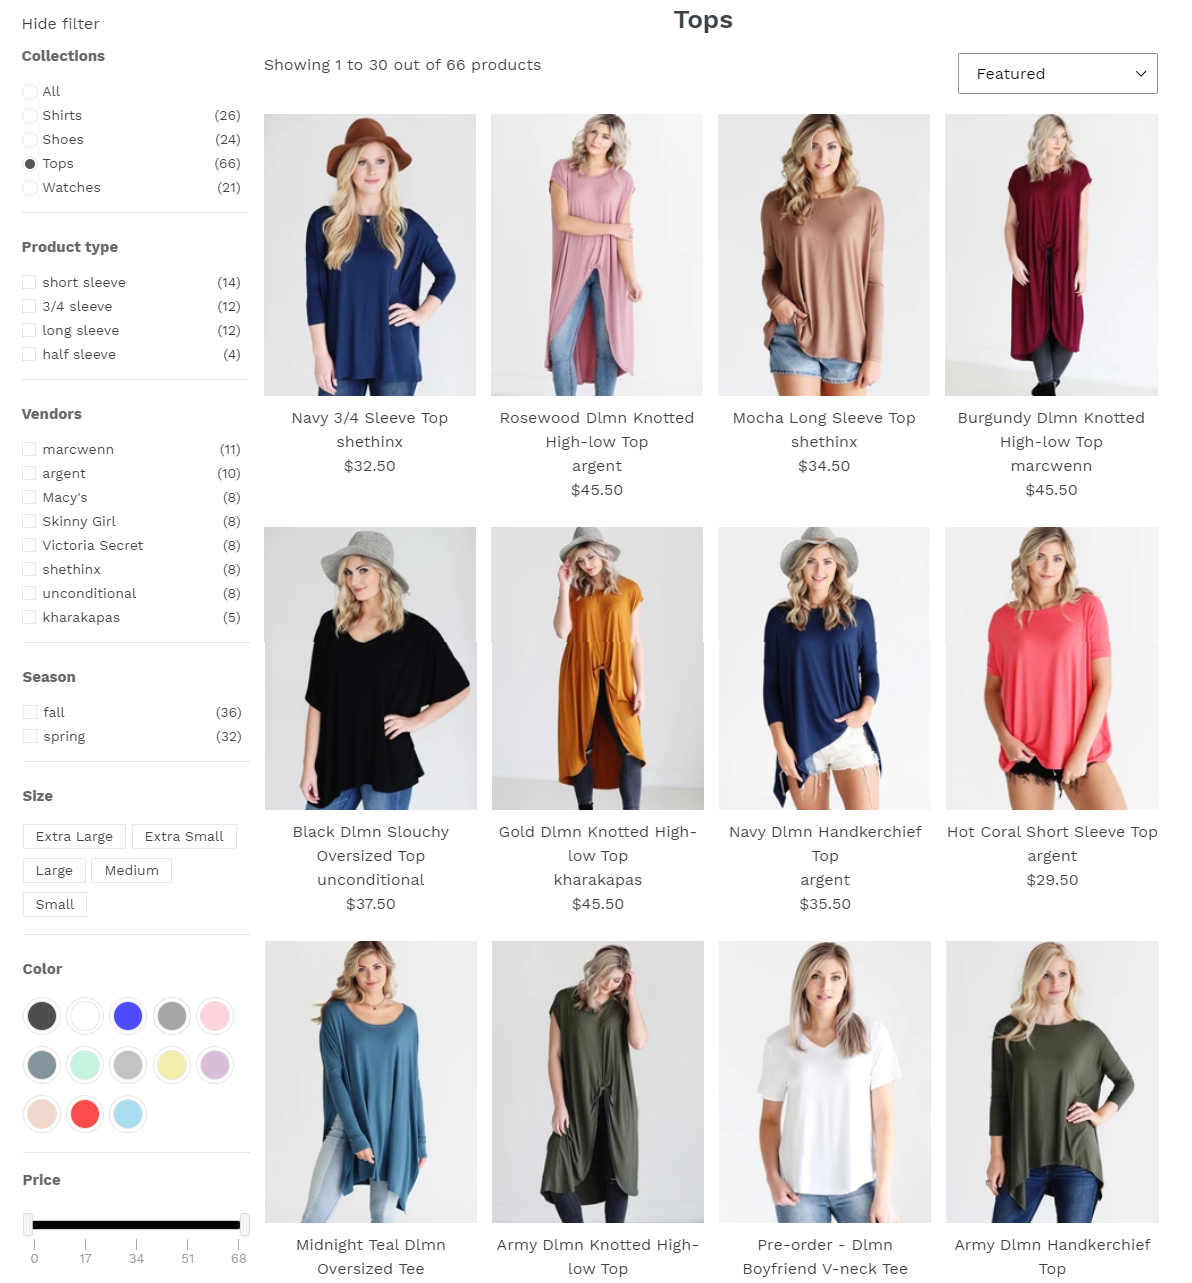
You will see your configured filter options at the sidebar on the collection pages.